Can You Upload Files to Discourse Forums?
I've had the privilege of moderating, growing and designing Discourse forums. I wanted to create this guide as a quick walkthrough to assist non coders and designers customize their Discourse forum's look-and-feel and play with coding! Y'all will need to take admin permissions to do this.

ane. Create a Header with links!
These icons are links to other places your customs lives, your blog, website, social media channels, or help pages! You can practice as many, or few equally possible.
What it looks like.

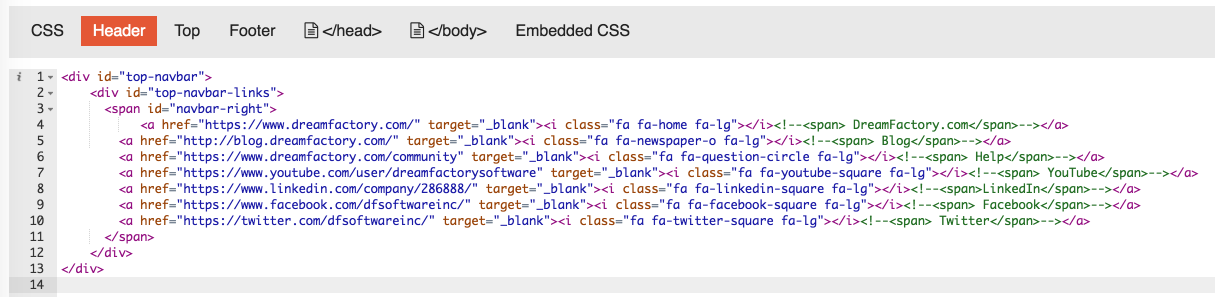
The Code.
Other Examples I've washed.


A non icon example from one of my favorite online communities, FeverBee.

Inspired? Absurd. It's all in the details. Let'due south dissect one of the lines and then you can learn how to customize information technology.
Become to Admin → Customize → CSS/HTML → create a New customization → click on the Header tab. This is where y'all will put the Header icon/s code. You can call it anything y'all want, I called mine "Header Icon".
Pace ane.
<a href="https://world wide web.dreamfactory.com/" target="_blank"><i form="fa fa-home fa-lg"></i><! — <span> DreamFactory.com</span> →</a> Insert the url you would like information technology directed to.
Step 2.
<a href="https://world wide web.dreamfactory.com/" target="_blank"><i class="fa fa-habitation fa-lg"></i><! — <span> DreamFactory.com</bridge> →</a> _blank Opens the link in a new window or tab. This is a handy script to go on in.
Stride three.
<a href="https://www.dreamfactory.com/" target="_blank"><i course="fa fa-abode fa-lg"></i><! — <span> DreamFactory.com</bridge> →</a> Find some cool icons that you desire to use. I recommend using FontAwesome. Search or browse icons, and and so click on the ane yous want to become the icon name. You lot can identify Font Awesome icons simply about anywhere with the <i> tag using the CSS Prefix fa and the icon's proper noun.
Optional: To increment icon sizes relative to their container, use the fa-lg (33% increase), fa-2x, fa-3x, fa-4x, or fa-5x classes.
Step 4.
<a href="https://www.dreamfactory.com/" target="_blank"><i class="fa fa-dwelling fa-lg"></i><! — <bridge> DreamFactory.com</span> →</a> This is optional. If you would like the name to exist displayed when someone hovers over the icon with their cursor, label it here. Sometimes if you have tons of icons, or you have an inexperienced customs, they may not recognize what the icons are representing. Having a characterization is commonly always a safe bet.
Pace 5.
Create as many of the above Icon links as you desire! Just make sure to wrap them in this:
                      <div id="elevation-navbar">
              <div id="height-navbar-links">
              <bridge id="navbar-correct">                    YOUR LINK/Southward CODE Hither. One line per link/icon.                      </span>
              </div>
</div>
The first link line volition be the left most icon. And then for instance, line 1 links to Facebook, line 2 links to twitter, line 3 links to your visitor dwelling house page, line 4 links to your blog. The icons will be displayed from left to right: Facebook, Twitter, Visitor home page, Blog. Facebook will exist nearest to the center of the forum folio if you first them on the right virtually side. In Step six, you can change the side the icons offset on, from correct in my examples, to left.
Step 6.
Now, navigate to the CSS tab. (next to the Header tab) This is where you will paste the below code. This code will help you customize the background color and which side you want the icons to start from.
/********** Nav Header **********/ #top-navbar {
height:44px;
groundwork-color:#7093b5;
width:100%;
z-index: 1001;
} div#superlative-navbar-links {
width:99%;
margin: 0 auto;
padding-acme:5px;
max-width:1100px;
} div#peak-navbar-links a {
colour:#FFFFFF;
font-size: 18px;
font-weight: lighter;
}#navbar-left {
#navbar-left a {
float: left;
margin-left: -15px;
padding-summit: 8px;
}
font-size: 20px;
padding-left: 20px;
} #navbar-right {
float:right;
padding-elevation: 8px;
} #navbar-right a {
padding-left: 20px;
}
I suggest merely customizing the above bolded Hex Color numbers. The beginning bolded Hex Lawmaking represents the color of the groundwork.
          #top-navbar {
            meridian:44px;
            groundwork-color:#7093b5;
            width:100%;
            z-index: 1001;
}
The second bolded Hex Code represents the color of the icon themselves.
          div#superlative-navbar-links a {
            color:#FFFFFF;
            font-size: 18px;
            font-weight: lighter;
}
Get your unique company color'south Hex Lawmaking #'due south. If y'all don't take them, you tin download an awarding that can allow y'all to pick colors straight from the internet. I employ tools such ColorZilla or Eyedropper for Chrome. Then, you would only navigate to a page where the colors are, and click on the color using one of those tools to go the Hex Colour #. Then, just copy and paste the number to supersede it.
Note, you lot must keep the "#".
Step 7.
Bank check the Enabled box and hit Save! That'due south it.
If you lot don't see the changes right abroad, do a hard refresh of the page and/or clear your cache and cookies.
— — —
Want even more icon functionality, such as animated icons, stock-still width or bordered? Cheque out more options and examples here.
ii. Add a logo!
Step 1.
Create a New style and proper name it something like "Company Logo Header". Paste this lawmaking under the Header tab at the top:
          <div id="top-navbar" course="container" style="padding-left:5px; padding-summit:5px;display:none;"><a target="_blank" href="http://www.dreamfactory.com/"></a>            DreamFactory Home
</div>
Update the link you desire the logo to redirect to in bold above and the proper noun in italics.
Step 2.
Upload the logo paradigm under a private category like Staff. Create a new thread and upload the epitome. Use this thread for storing images and files used in the forum design. Don't delete it! This same method will exist used to store your imprint image outlined in the next section below.
- Utilize the upload toolbar icon in the mail editor, or elevate-and-drop or paste images.
- Submit your reply to post it.
- Right click the images in your new mail to get the path to the uploaded images, or click the edit icon to edit your mail and retrieve the path to the images. Copy the prototype paths.
- Paste those image paths into basic settings:
http://YourForumURL.com/admin/site_settings/category/required Or navigate to Settings → Required → Logo URL.
You're all done!
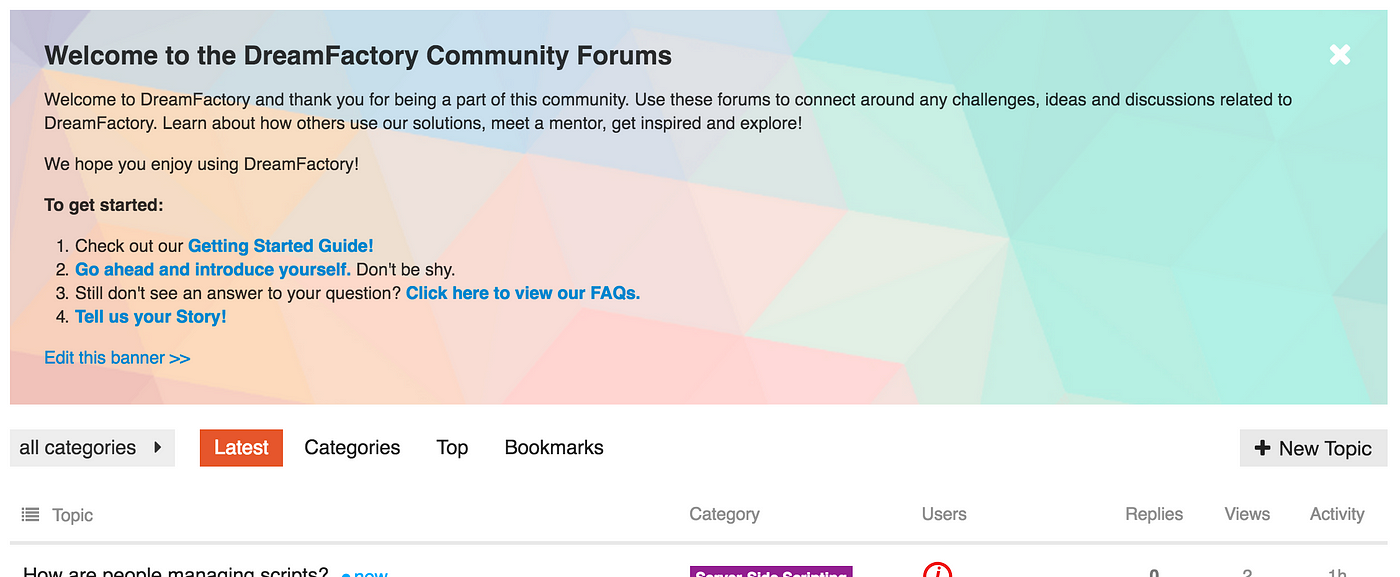
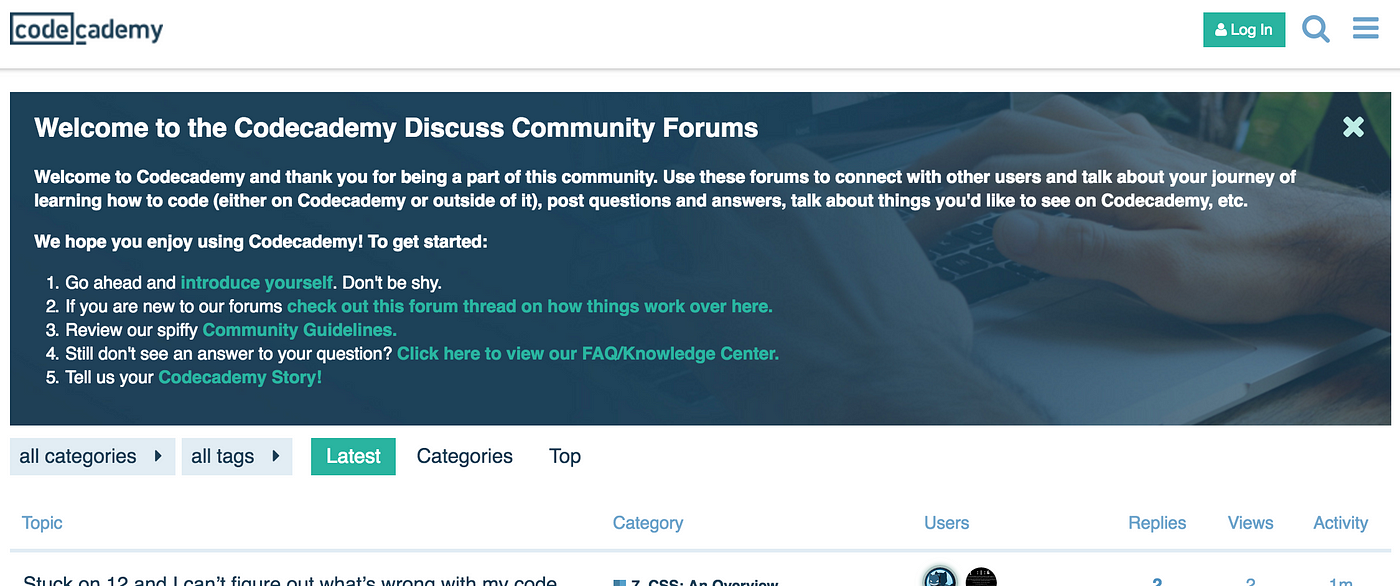
three. Create a Banner!
Banners are bully for on-boarding users, and highlighting of import information. It also helps guide folks on how to employ the forum and collaborate in your community! Commonly they include community guidelines, a way to learn how to use the forum or mayhap relevant visitor information like a upcoming event, problems or release. Here'south some examples of banners I've created for DreamFactory Software and Codecademy.
Pace 1.
Create a New style and name it something like "Banner". Under CSS paste the lawmaking below:
          // Banner          #banner {
            border-radius: 0;
            box-shadow: none;
            background: url("IMAGE PATH URL Here") no-repeat;
            padding: 2em 2em 1em 2em;
            max-height: inherit;
            background-size: cover;
            groundwork-color: rgba(255, 255, 255, 0.vii);
            background-blend-mode: color;
            color: rgba(0,0,0,0.8);
            margin-bottom: 20px;
}          #banner .shut {
            color: #fff;
}          #banner #banner-content h2 {
            margin-bottom: 0.75em;
}
Change the bolded url to your image url. Upload it under a private area like Staff, and then right click to re-create the image accost. Remember we just did this higher up in section ii, nether step 2.
EDIT: I've had feedback that the higher up code doesn't work for some folks. And so below is slightly more simplified code.
Attempt this more simplified code:
          #banner {
edge-radius: 0;
box-shadow: none;
background: url("IMAGE PATH URL HERE") no-repeat;
padding: 20px;
max-height: inherit;
background-size: comprehend;
groundwork-color: rgba(255, 255, 255, .6);
background-blend-mode: colour;
}
Footstep 2.
Now, you need to create a new Thread that will serve as the text of the banner. Once again, yous will want to create a new Thread under a private category similar "staff". See below my Imprint Thread under Staff.
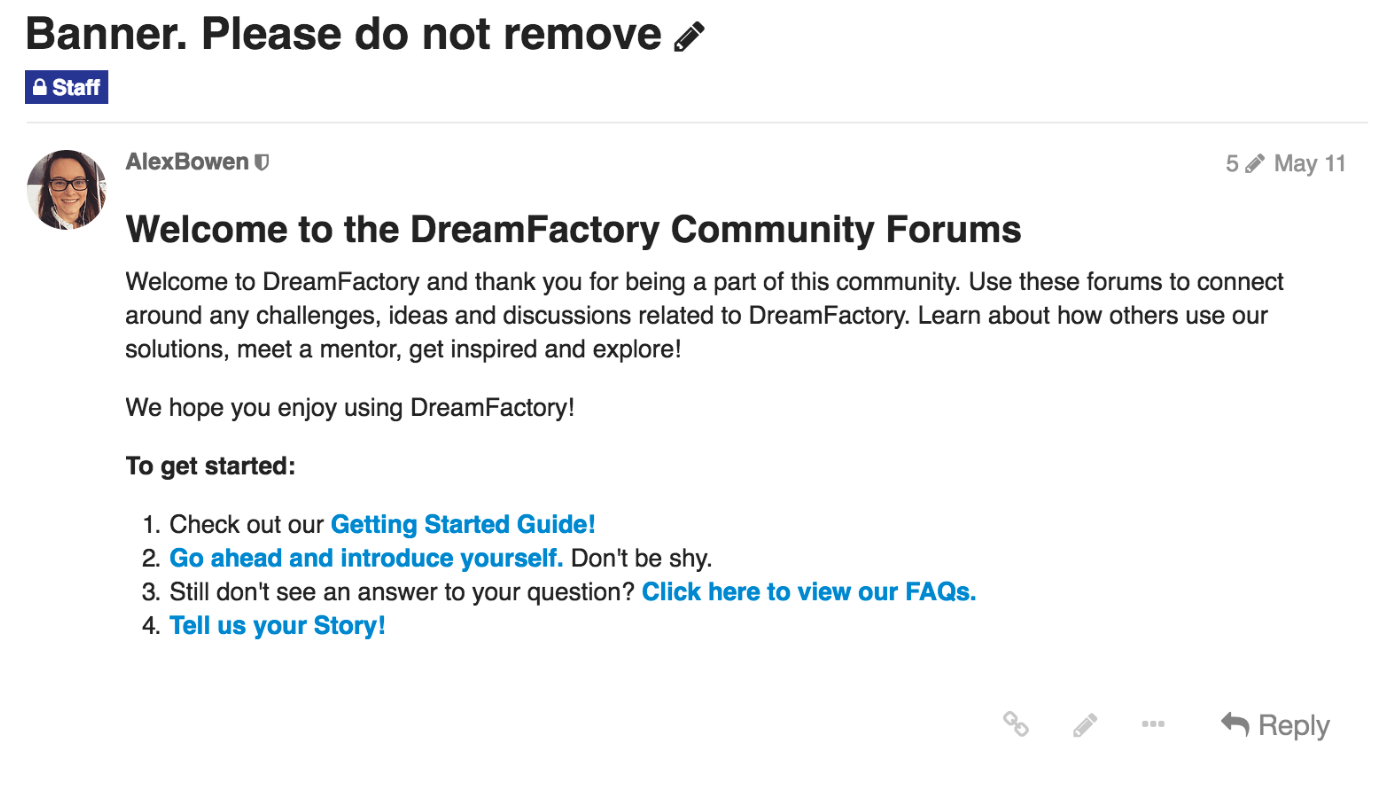
After you lot've posted information technology as a annotate, y'all will need to click the wrench icon and select Pivot Topic.
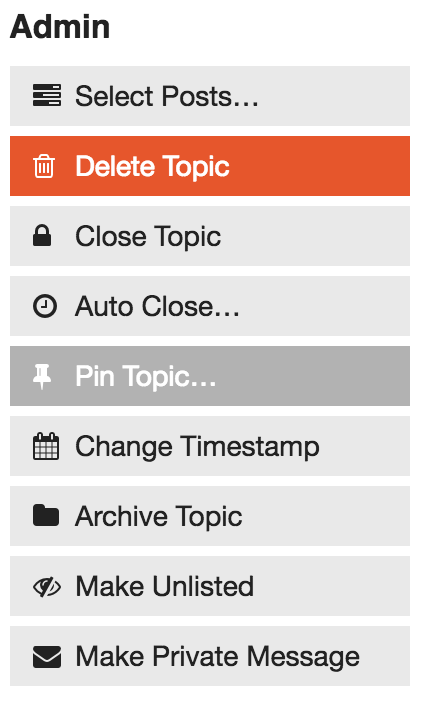
So select the third option — Banner Topic.
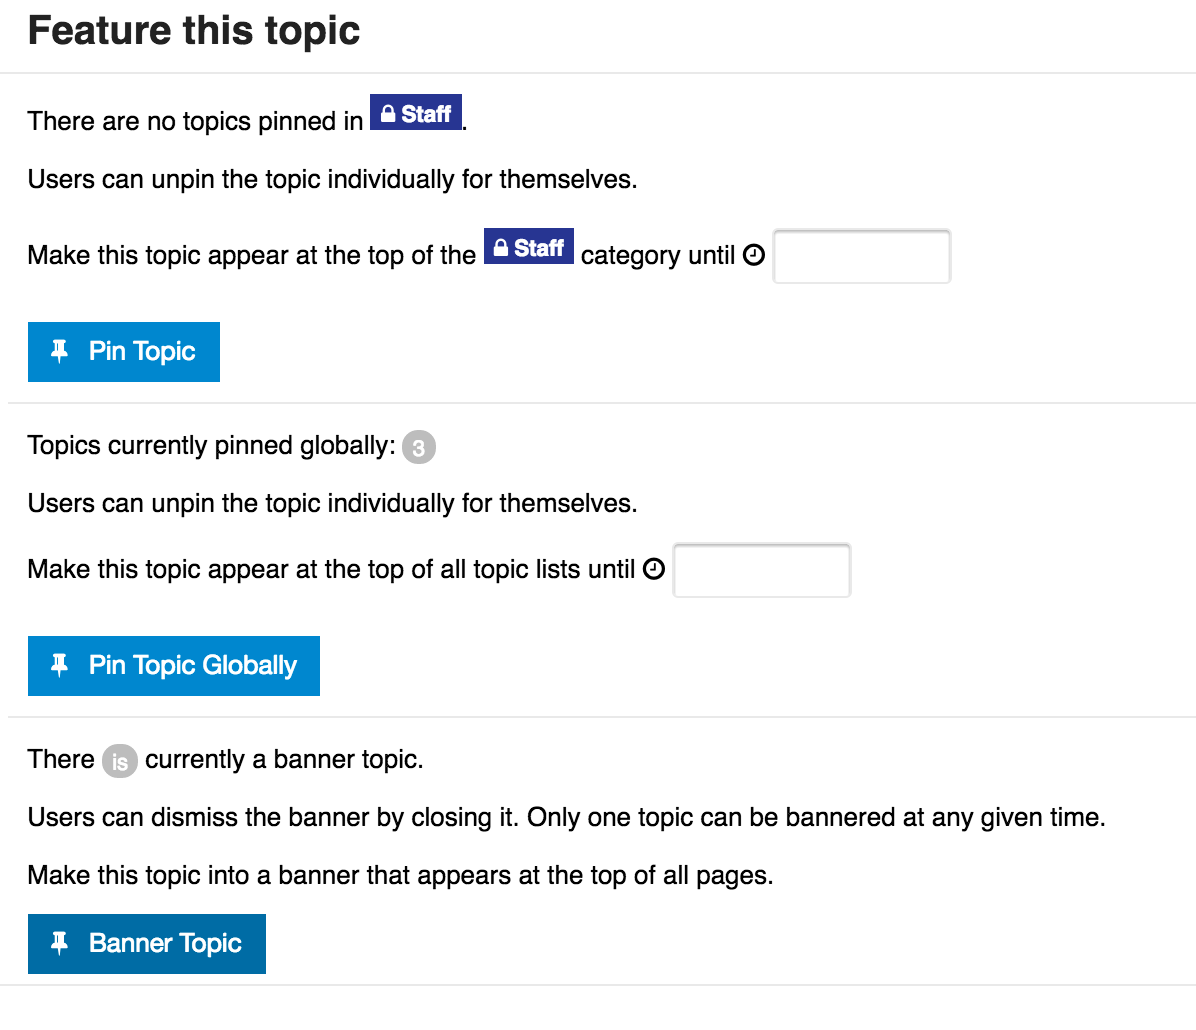
When you do that, a xanthous comment volition appear:
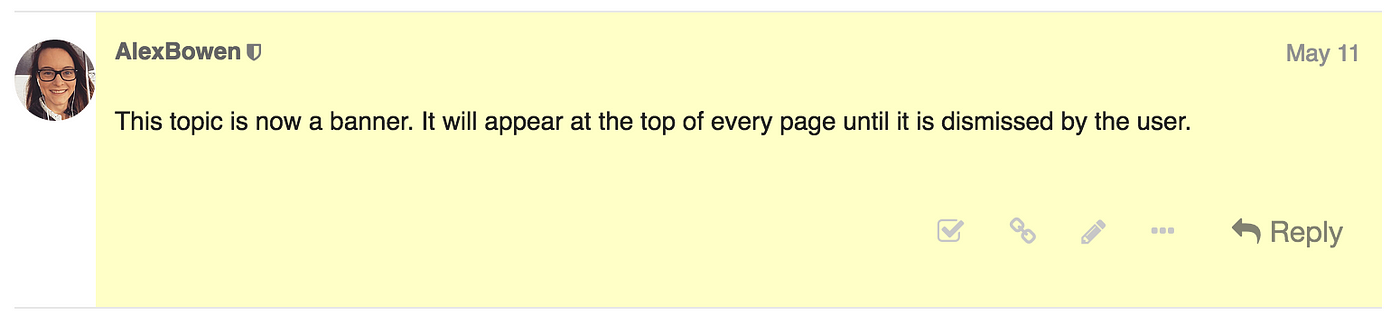
Boom! Every bit an FYI: Users will be able to exit out the banner at someday to remove information technology from view.
— — —
Congratulations! :) You've just customized your Soapbox forum's await and feel. Let me know what yous thought about this tutorial, and if you have whatsoever suggestions or feedback leave them in the comments beneath. Or, join our thread where we talk about this and more than on FeverBee here.
Source: https://alexandrabowen.medium.com/customizing-a-discourse-forum-for-non-coders-and-designers-83ef70e1d757
Post a Comment for "Can You Upload Files to Discourse Forums?"