Which Docu Sign System User Can Review Document and Edit for Salesforce
Introduction:
DocuSign for Salesforce helps us shorten sales cycles, increase shut rates, increase productivity, and reduce paper waste, resulting in savings of fourth dimension. It allows us to quickly pull data from Salesforce objects like Lead, Account, Contact, Opportunity etc. and then either sign documents online, or ship them out for signature directly from Salesforce. The signed documents are then returned to Salesforce and attached to the corresponding salesforce records.
Why Choose Docusign?
- Merge Fields Embed the Power of Salesforce into your Documents
DocuSign allow usa to make use of Salesforce (merge) fields, by only dragging and dropping data fields into vital documents. This never requires any programming cognition, which results in reduced operating costs.
- Accurate & Secure Transactions
DocuSign provides 100% accurate & secure transactions, reduces employee time spent on handling and tracking documents, and eliminates costs of paper, ink, press, faxing and mail. The transaction details are tracked in existing systems every bit well as Salesforce.
- Collaborate in the Cloud
Users can leverage DocuSign for Salesforce to close deals in the deject and resend to all signing parties to accept. Changes are tracked throughout the process, so users always know what was changed, when and who signed off.
- Unmarried Sign On with your Salesforce Password
It likewise provides Single Sign On facility; then users can automatically log into DocuSign with their existing Salesforce username and password, and the user is n0t required to retrieve and manage multiple passwords.
Steps to create DocuSign Developer Account
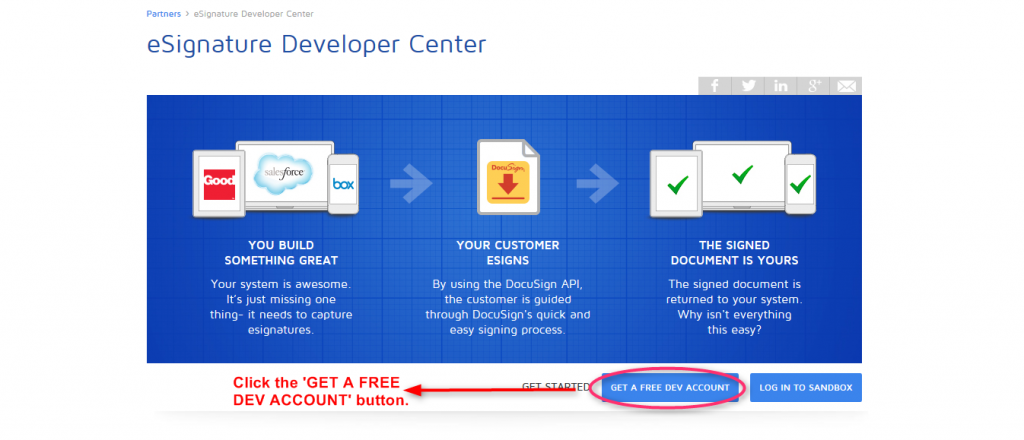
Pace 1: Become to the following url to create DocuSign developer account,
https://world wide web.docusign.com
Step 2 : At present, click the 'Get a Free Dev Business relationship' button. (For trial version)
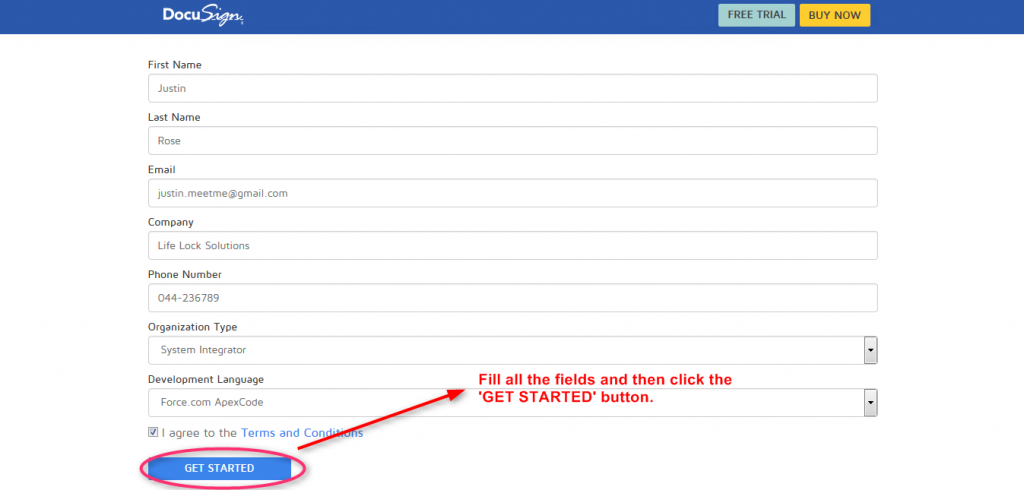
Step three : Adjacent, fill in all the fields with appropriate information and then click the 'Go Started' button.
Annotation: Specify a valid email address to receive the activation lawmaking.
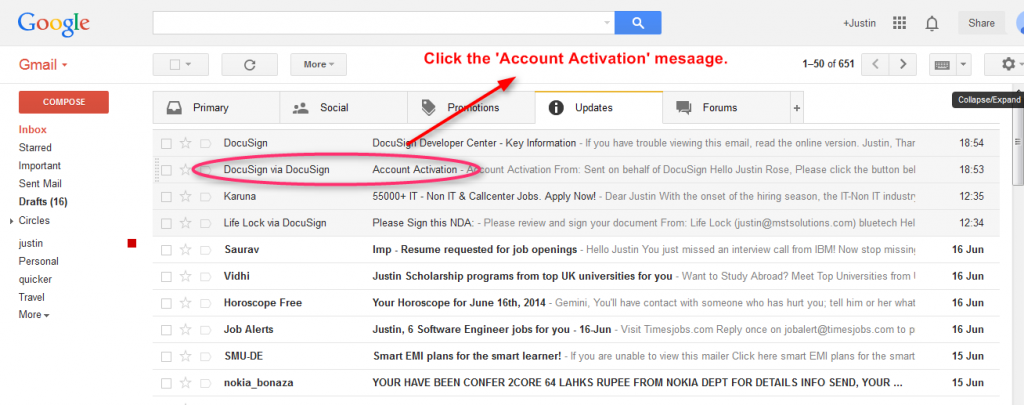
Step 4 : At present, bank check your email and click the 'Account Activation' message.
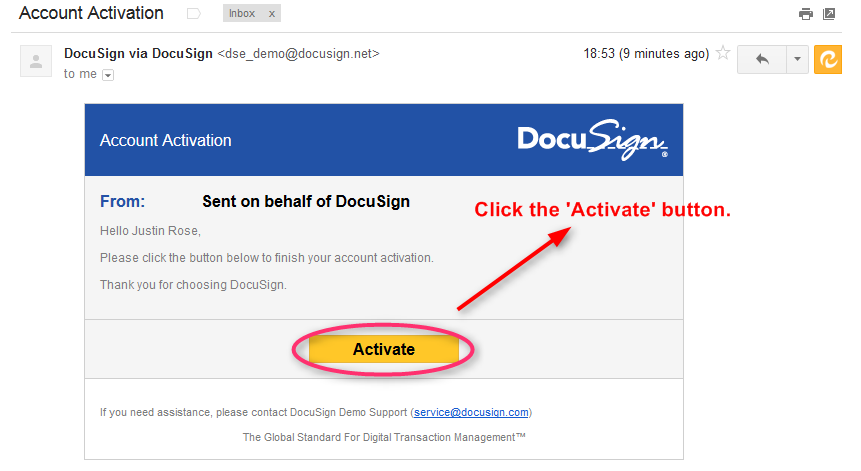
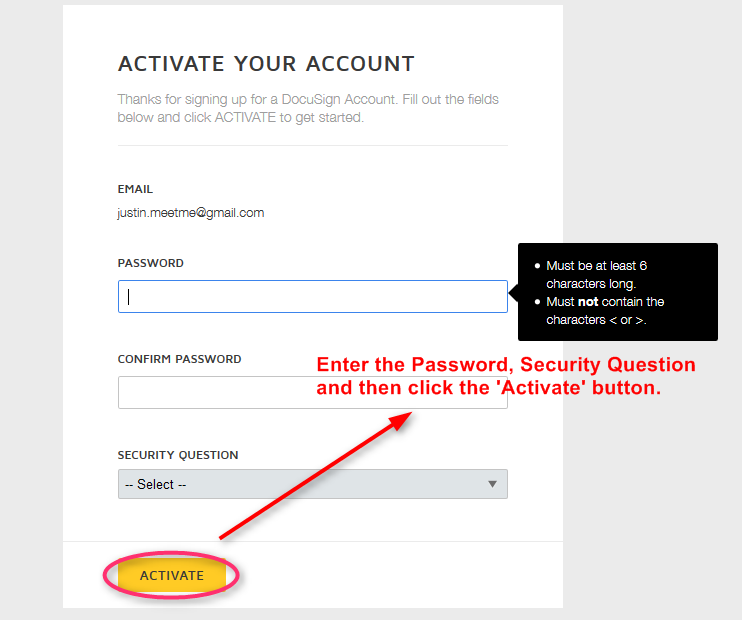
Step 5 : Side by side, click the 'Activate' button.
Step 6: Now, enter the password and security question and and then click the 'Actuate' button.
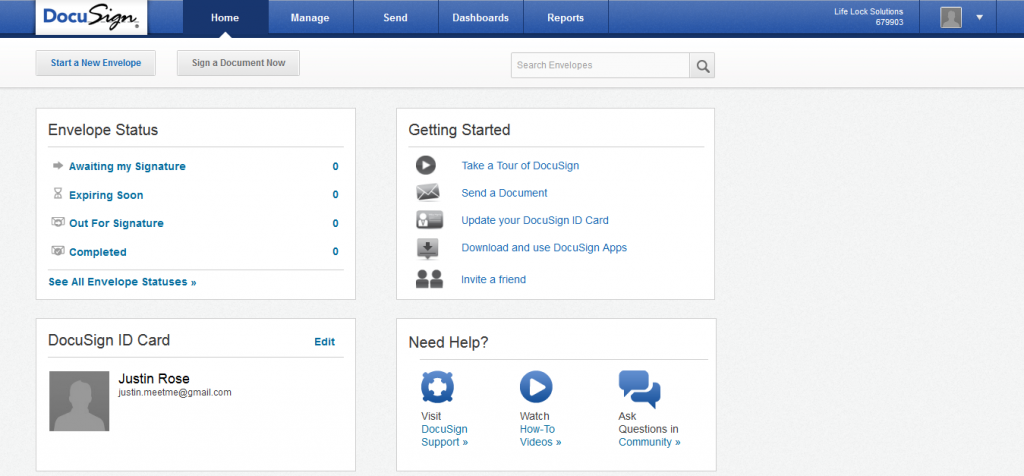
Step 7 : Your DocuSign programmer account is created successfully. Finally, remember this username and password.
Steps to install DocuSign in Salesforce
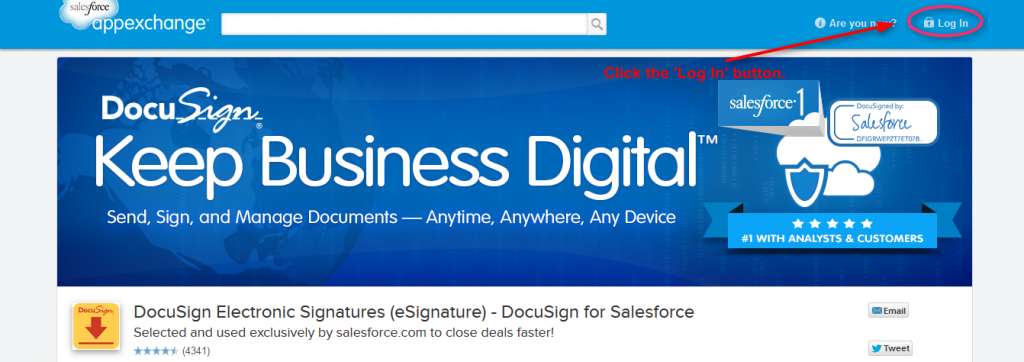
Step one : Go to the following App Exchange url to install DocuSign application,
https://appexchange.salesforce.com/listingDetail?listingId=a0N30000001taX4EAI
Step ii : Now, click the 'Log In' button.
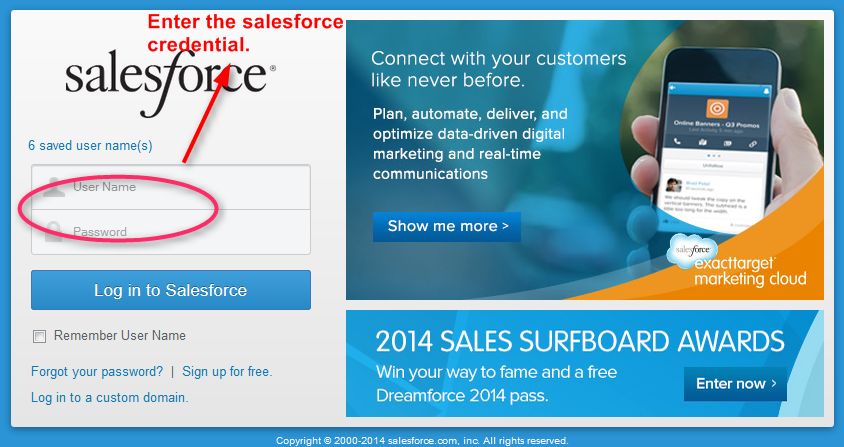
Step 3 : Y'all can log into the AppExchange using one of the following methods.
- Using Salesforce Production Credential (if you accept the production credential) or
- Using Salesforce Developer Edition Credential.
Step iv : Next, click the "Get It Now" button.
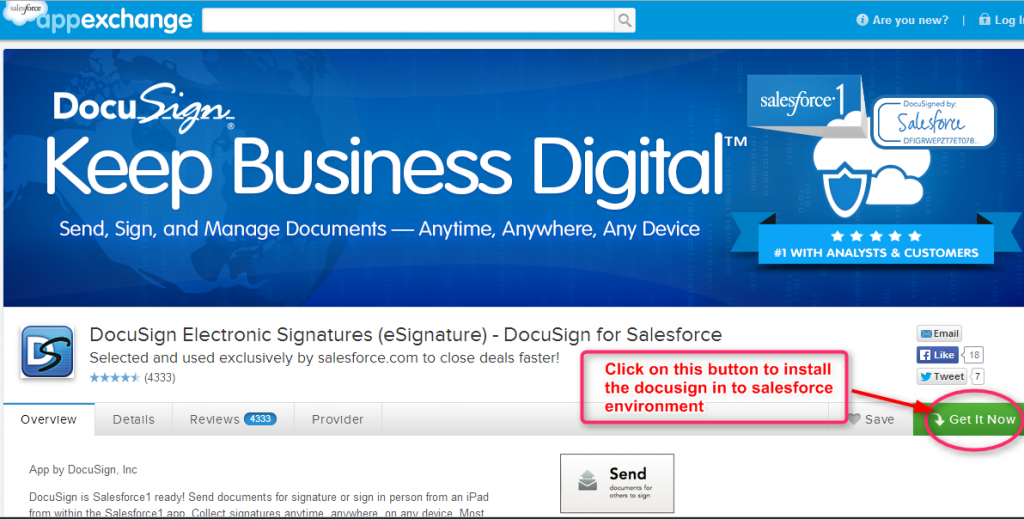
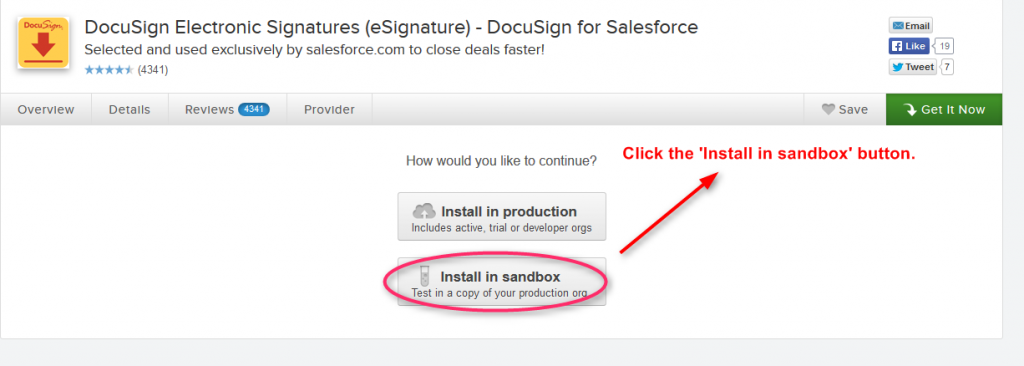
Step five : Now,click the 'Install in sandbox' button to install the DocuSign application on a Sandbox. For Production, click 'Install in Production'
Step half-dozen : Adjacent, enable the checkbox and then click the 'Confirm and Install' Button to go along installation process.

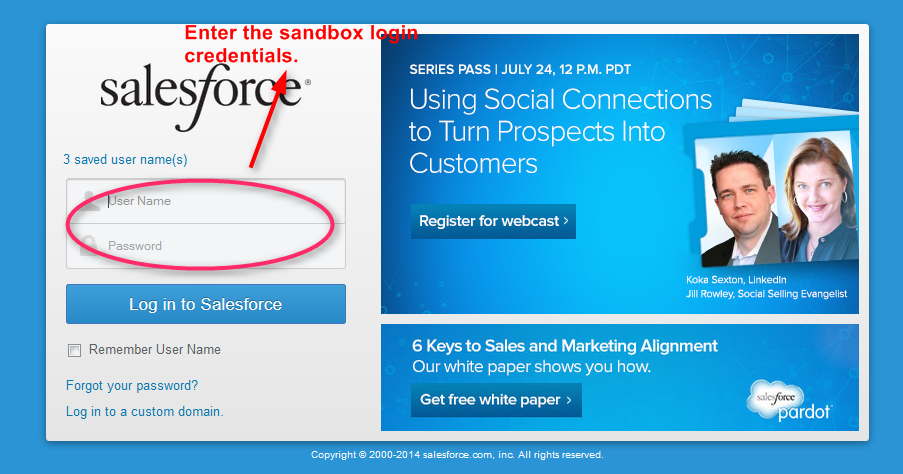
Step vii : Enter the sandbox login credentials, and then click the 'Log in to Salesforce' push.
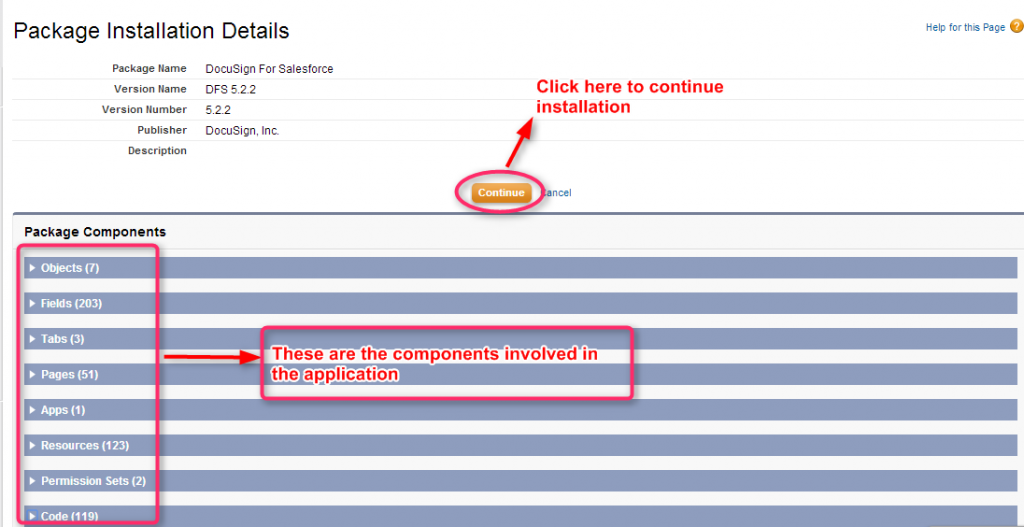
Stride 8 : At present, you will run into the list of Package components and the version details of the application. Click the 'Continue' button to install.
Step 9 : Review the third-political party access data. This shows a list of websites that the parcel might send data to or receive information from during operations. Finally, enable the checkbox and then click the 'Continue' button.

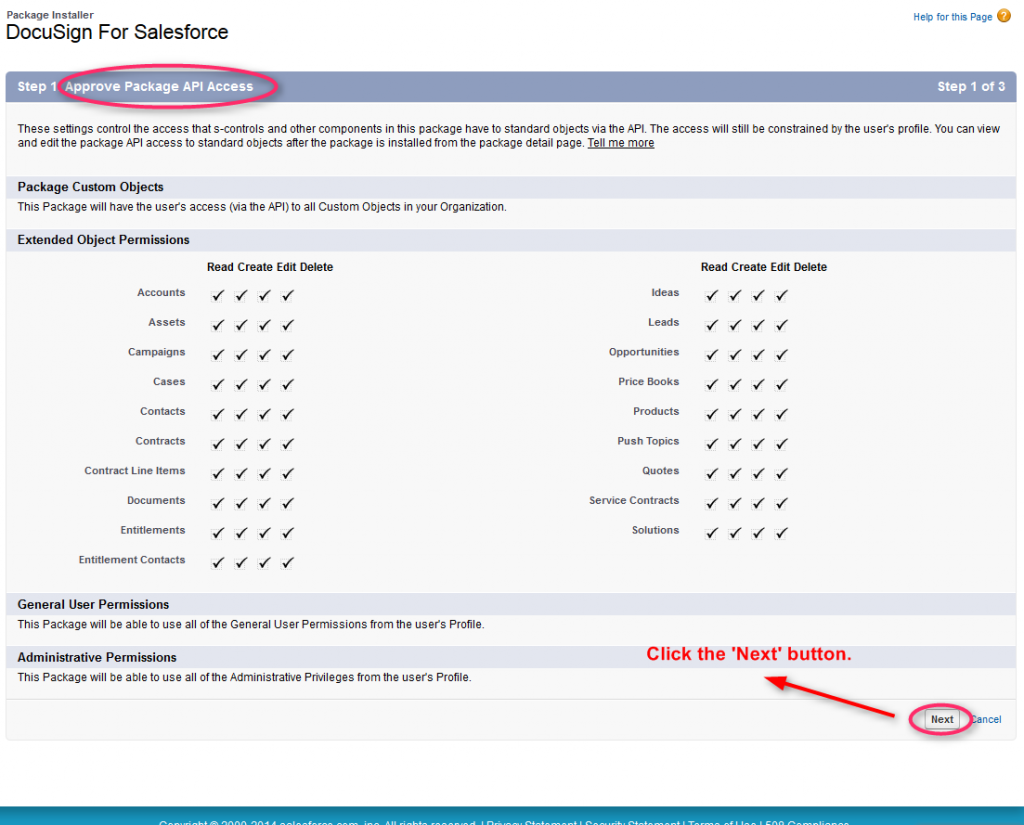
Step 10 : Corroborate Packet API Admission. Review the information on the page and so click the 'Next' button to proceed the installation process.
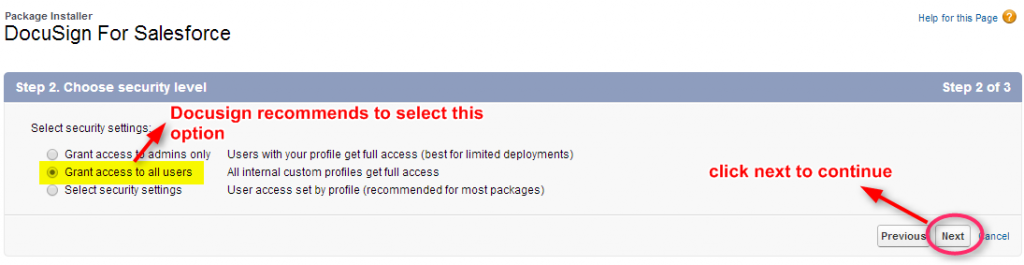
Footstep eleven : Choose the security level. The security level determines user access to DocuSign for Salesforce. DocuSign recommends yous select 'Grant access to all users' (you can modify user access later through the DocuSign Admin tab) and then click the 'Next' to go along.
Step 12 : Click the 'Install' button to complete your installation process.

Steps to configure the installed Package
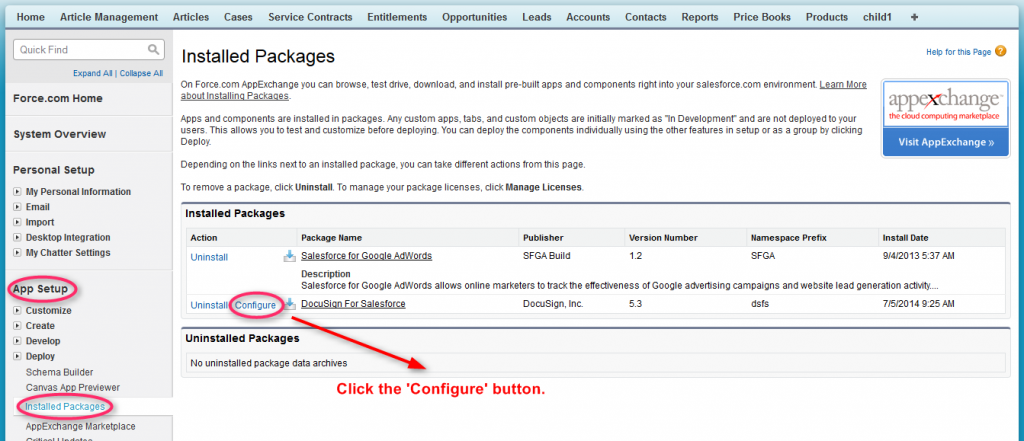
Pace 1 : Afterward installation, Go to App Setup Deploy Installed Packages,notice the 'DocuSign for Salesforce' parcel and then click the 'Configure' button to start the configuration.
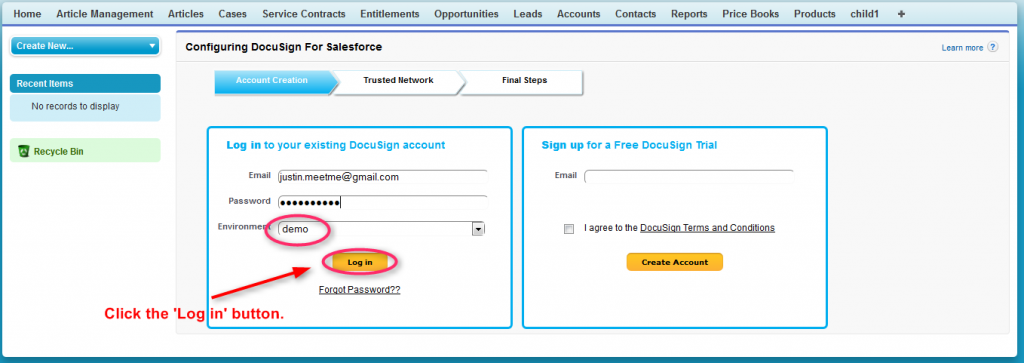
Step 2 : Now, you volition be redirected to 'Configuring Docusign For Salesforce' page.
- Enter the Email and countersign of Docusign Developer Account.
- Set the Environment to demo for trial version.
- And and then click the 'Log in' push button.
Step iii : In social club to enable a Salesforce connexion to DocuSign, you lot must add together DocuSign as a trusted network and connect your Salesforce account to DocuSign. Add together all four IP ranges as follows
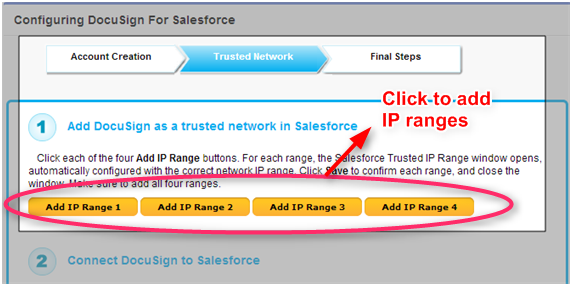
A popular-upward window with the Salesforce Network Access Trusted IP Range Edit window opens and the IP range data is shown.
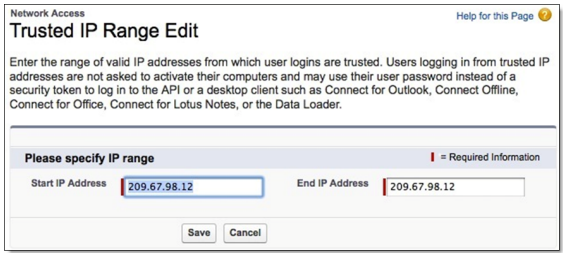
- Click Save. Do not change the IP range. The range is populated automatically with the correct values for remote access to the DocuSign data centers.
- Close the Network Access pop-up window.
Echo the 'Add IP Range' steps for each of the remaining Add IP Range buttons. After adding all iv ranges, you will take the following IP ranges listed in Salesforce Network
Access as Trusted IP Ranges:
- 209.67.98.1 through 209.67.98.63
- 206.25.247.129 through 206.25.247.159
- 209.46.117.161 through 209.46.117.191
- 162.248.184.1 through 162.248.187.255
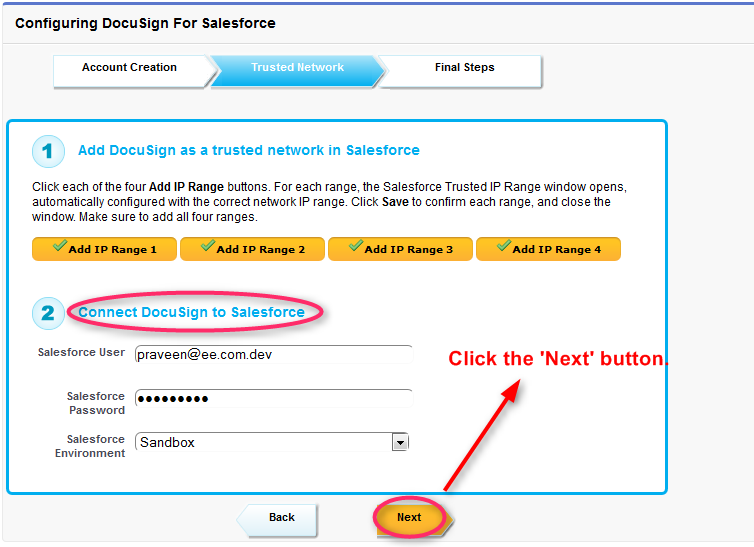
Footstep 4 : Now go to 'Connect DocuSign to Salesforce' department and enter the following data:
- Enter the Salesforce Username and Password
- Select the Saleforce Environs to Sandbox for trial version.
- And and so click the 'Next' push button.
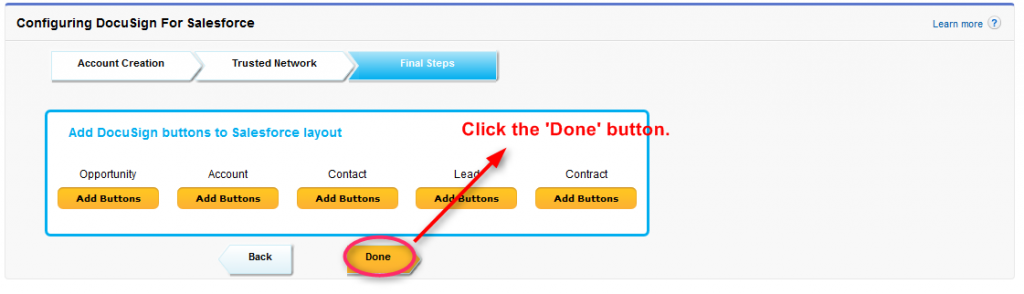
Step 5 : Finally, click the 'Done' button to connect with Docusign programmer account.
Integrator Key:
Once the connection is created between Salesforce and Docusign, next we need the Integration Fundamental. This central is a Unique Identifier for each DocuSign integration. An Integrator Key is required for all integrations, and if y'all desire to motion to Production, the Integrator Key must be authorized by DocuSign for Product.
All Integrator Keys are used for development first, and as a result, they are all managed (and requested) in DocuSign's DEMO service. If yous already accept a DocuSign Developer account (demo), log into the business relationship and request an Integrator Key. If yous do non have a Demo Developer Account, go to the DocuSign Developer Center: https://www.docusign.com and asking a free business relationship. Later on development is washed using Demo Integrator Key, so we must go that Integrator Fundamental certified before moving to product.
Important: Web service calls made without an Integrator Primal volition receive an exception for every call made. The exception message states, "The specified Integrator Key was not found or is disabled".
Sample Code :
In gild to use DocuSign API, you need to recollect your DocuSign API credentials. Go to https://demo.docusign.internet, sign into your demo account, and so go to Preferences -> API. There you will notice these values:
Integrator's Key: ZORO-a81ec71a-cb17-4af0-b1aa-9513115cbf02
API UserName: 0e212ae6-1e12-40c1-8f5a-a57458ccaa63
API Password: <your electric current countersign>
API Business relationship ID: 736e7948-6861-4ef3-ae71-4c56603dc14f
//Set Authentication:
String auth = '<DocuSignCredentials><Username>'+ userId
+'</Username><Countersign>' + password
+ '</Countersign><IntegratorKey>' + integratorsKey
+ '</IntegratorKey></DocuSignCredentials>';
System.debug('Setting authentication to: ' + auth);
dsApiSend.inputHttpHeaders_x = new Map<Cord, String>();
dsApiSend.inputHttpHeaders_x.put('X-DocuSign-Authentication',auth);
//Add Document:
DocuSignAPI.Document document = new DocuSignAPI.Document();
document.ID = ane;
document.pdfBytes = EncodingUtil.base64Encode(pdfdocument);
document.Name = 'Contract';
document.FileExtension = 'pdf';
envelope.Documents = new DocuSignAPI.ArrayOfDocument();
envelope.Documents.Document = new DocuSignAPI.Document[1];
envelope.Documents.Document[0] = document;
//Add Recepient:
DocuSignAPI.Recipient recipient = new DocuSignAPI.Recipient();
recipient.ID = 1;
recipient.Type_x = 'Signer';
recipient.RoutingOrder = ane;
recipient.E-mail = 'Test@gmail.com';
recipient.UserName = 'TestName';
//Calling the API to send Document to the Recepient
DocuSignAPI.EnvelopeStatus es = dsApiSend.CreateAndSendEnvelope(envelope);
Docusign certification process
Once the development is done in the demo environment, applications must go through a certification process to deploy the application in production environment. DocuSign Certification Review team will examine the awarding to ensure following evolution all-time practices take been followed.
1. API Certification Checklist
Here, nosotros need to provide the basic information regarding our application, company name, technical and business organisation contacts, and technical and business insight on how you programme to work with DocuSign and the API.
two. A video demonstrating the application
We demand to provide a video demonstrating end-to-end functionality of our application. This video should conspicuously explain the user feel from both the sender and signer perspective. Also, information technology should include all "signing" options, including Reject to Sign, Sign on Paper, End Later, Modify Signer, etc.
three. Screen shots of exception handling messages
The exception handling screen shot must expose what users observe when signing and sending the documents fail due to an unexpected error. Nosotros must prove a friendly mistake bulletin with specific contact information to our support staff such as email and/or phone.
4. JSON, Lather, or XML HTTP/s web service request and response trace
The Trace must clearly show the request and response including headers, and the Docusign should exist able to recreate the issue using the provided trace. The provided trace must as well incorporate URI, endpoint, authentication method, credentials, and payload etc.
five. Single engagement indicating at least xx examination transactions
The log file should contact xx examination transactions to bear witness the integration from finish-to-end. The tests need to be on a single day and without interference of other testing. These tests must be run using the Integrator Key provided in the Checklist for promotion. For a given engagement, DocuSign will pull our server logs to validate no errors occurred and best practices are beingness followed similar caching, and will focus effectually how the awarding polls status of the certificate.
six. Details on how condition is obtained via Connect, Fetch, or API
Provide a detailed description of how envelope status is obtained via Connect, Fetch, or API. Docusign will check the server log to ensure best practices have been followed.
Conclusion
DocuSign is a powerful Digital Transaction Management tool that allows businesses to share documents with their customers for electronic signature easily, securely and efficiently in the Cloud.
Source: https://www.mstsolutions.com/technical/docusign-integration-with-salesforce-using-api/
Post a Comment for "Which Docu Sign System User Can Review Document and Edit for Salesforce"